Aug . 06, 2025 01:00 Back to list
Precision Knife Edge Ruler | Metal & Aluminum Inspection Tool
In the world of high-precision metrology and quality control, few tools are as fundamental and critical as the knife edge ruler. This isn't your ordinary ruler; it is a master instrument designed for one ultimate purpose: to verify straightness and flatness with uncompromising accuracy. As manufacturing tolerances become increasingly tight across industries like aerospace, automotive, and optics, the demand for reliable inspection tools has skyrocketed. The global industrial metrology market is projected to reach USD 15.3 billion by 2028, growing at a CAGR of 6.8%, a clear indicator of the rising importance of precision measurement. This guide delves deep into the world of the knife edge ruler, exploring its technology, applications, and why choosing a high-quality instrument is a non-negotiable investment for modern engineering.

Decoding the Technology: What Sets a Knife Edge Ruler Apart?
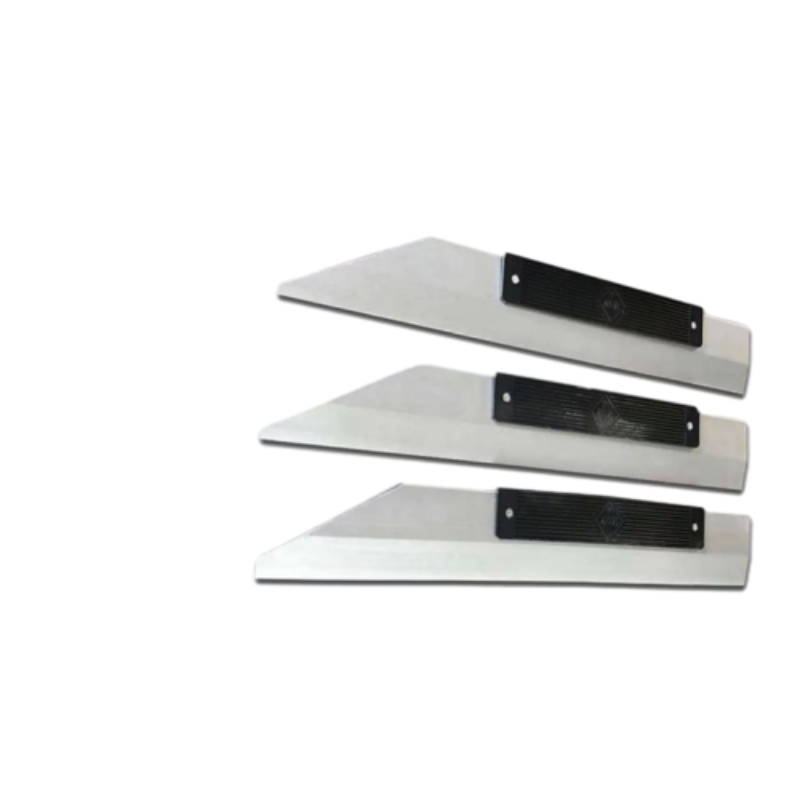
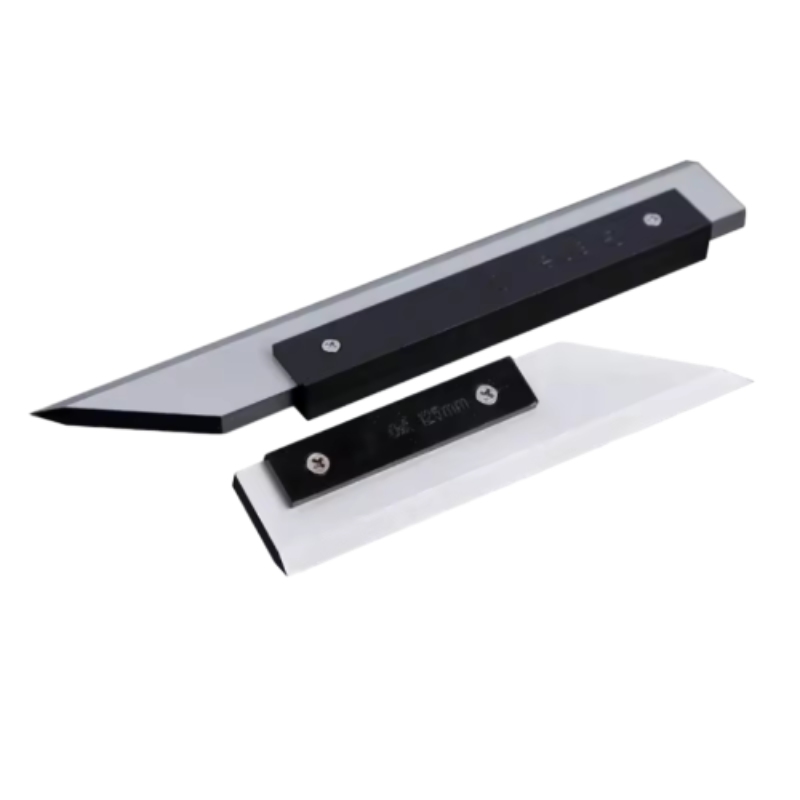
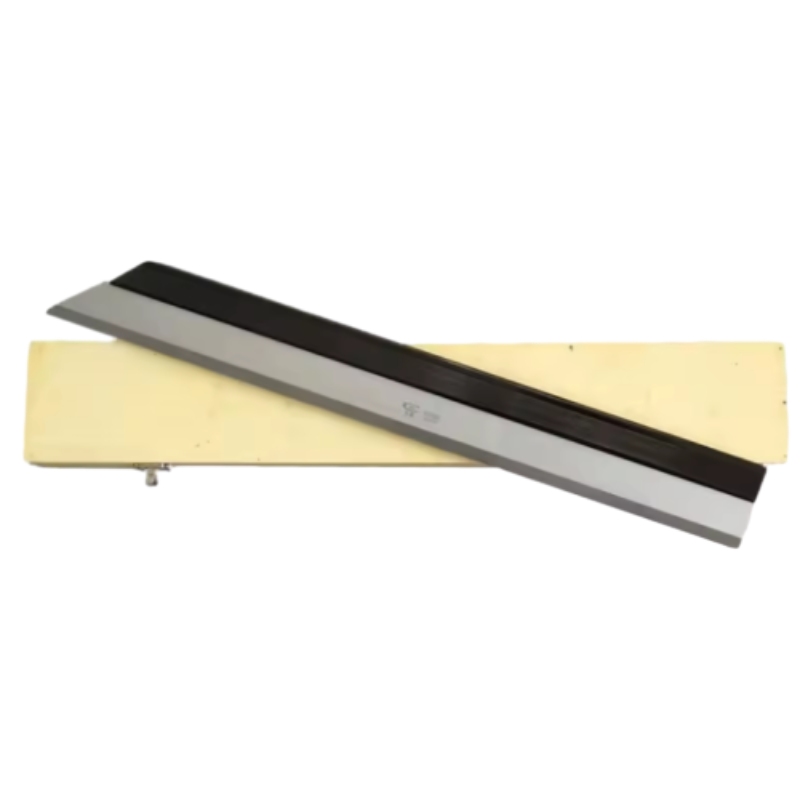
A knife edge ruler, also known as an inspection straight edge, derives its name from its beveled edge, which is lapped and finished to form an extremely fine, straight line. This design minimizes the contact area with the surface being measured, virtually eliminating the parallax error common with standard flat rulers. When placed on a surface and backlit, even the most minuscule deviations from perfect straightness are revealed as light gaps, allowing for qualitative and quantitative analysis of surface profiles.
Unlike a common metal angle ruler or standard aluminum rulers, which are designed for general marking and measuring, the knife edge ruler is a comparative instrument. Its value lies not in the printed gradations (which it often lacks) but in the certified straightness of its edge. This is a crucial distinction that places it in the same category as other master-grade tools like granite surface plates and gauge blocks.
Core Technical Advantages and Parameters
The performance of a knife edge ruler is defined by a set of critical technical parameters that reflect its quality and suitability for specific tasks. Understanding these specifications is key to selecting the right tool.
- Exceptional Straightness Tolerance: The most crucial specification. It's often defined by standards like DIN 874. For instance, Grade 00 (laboratory grade) allows for a deviation of only (2 + L/1000) µm, where L is the length in mm. For a 500mm ruler, this means a maximum deviation of just 2.5 micrometers.
- Superior Material Stability: High-quality rulers are made from dimensionally stable materials like hardened tool steel, stainless steel, or even granite (often referred to as a marble ruler for its material properties). This ensures the ruler's accuracy is maintained across temperature variations and over time.
- Optimized Edge Geometry: The "knife edge" is typically beveled at a 30° or 45° angle, creating a line-contact scenario that enhances visual inspection accuracy. This fine edge is achieved through a multi-stage grinding and lapping process.
- Durability and Wear Resistance: The use of hardened steel (typically >60 HRC) ensures the measuring edge resists wear and damage, preserving its integrity over a long service life.

Technical Specification Breakdown
To provide a clearer picture, here is a detailed table of typical specifications for a professional-grade knife edge ruler. These are the numbers that guarantee performance and are certified during manufacturing.
| Parameter | Specification / Value | Significance in Application |
|---|---|---|
| Product Name | STR Precision Knife Edge Ruler | Identifies the high-precision product line. |
| Material Options | Hardened Tool Steel (T10A), Stainless Steel (4Cr13), Granite | Tool steel offers excellent hardness; stainless steel provides corrosion resistance; granite offers supreme thermal stability. |
| Hardness (Steel) | ≥ 62 HRC (Rockwell Hardness) | Ensures high wear resistance and prevents the edge from being easily nicked or damaged, preserving accuracy. |
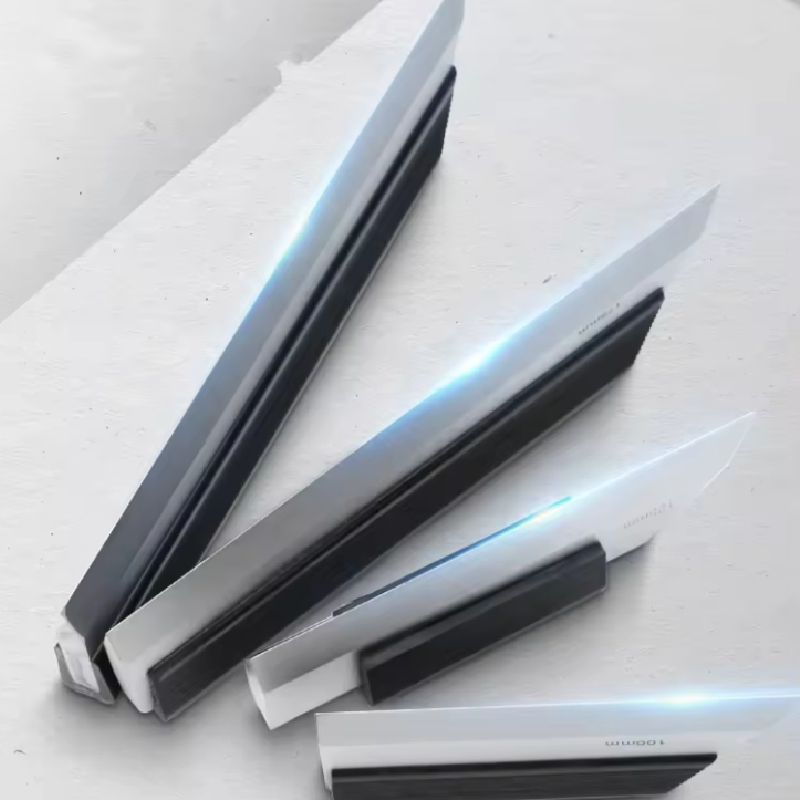
| Standard Lengths | 100mm, 200mm, 300mm, 500mm, 1000mm, 2000mm (custom available) | A wide range of sizes to inspect various component dimensions, from small engine parts to large machine beds. |
| Accuracy Grade | DIN 874/0, DIN 874/00 | Defines the maximum permissible deviation from a perfect straight line. Grade 00 is for master calibration labs. |
| Straightness Tolerance (Grade 00) | (2 + L/1000) μm | A mathematical formula for ultimate precision. Guarantees microscopic accuracy over the entire length. |
| Bevel Angle | 45° ± 2° | Optimized for casting a clear shadow and allowing light to pass through the smallest gaps for easy detection. |
| Surface Finish | Precision Lapped Measuring Edge, Ground Body | The lapped edge provides a near-perfect line contact, while the ground body ensures easy and safe handling. |
| Thermal Expansion Co-efficient (Steel) | ~12 µm/(m·°C) | A known factor for professionals to consider when performing measurements in non-temperature-controlled environments. |
From Our Experience: The Practical Impact of Grade 00
A client in the aerospace sector was struggling with inconsistent sealing on hydraulic manifolds. Standard straight edges showed the surfaces to be flat. However, by using our Grade 00 knife edge ruler, their quality team was able to identify a subtle, 5-micrometer "bow" across the sealing face—a deviation invisible to less precise tools. This discovery led to a refinement in their lapping process, eliminating leaks and preventing costly in-field failures. This is a testament to how investing in superior accuracy directly translates to product reliability and performance.
Data-Driven Comparison: Visualizing Performance
Claims of quality must be backed by data. Here, we visualize how a high-quality inspection ruler compares against standard-grade tools and how its application is distributed across key industries.
Performance Comparison: STR Knife Edge Ruler vs. Standard Straight Edge
Blue Bars: STR Precision Knife Edge Ruler | Light Blue Bars: Standard Generic Straight Edge
The Meticulous Manufacturing Process: Forging Precision
The extraordinary accuracy of a knife edge ruler is not accidental; it is the result of a rigorous, multi-stage manufacturing process. Each step is designed to build upon the last, refining the material's properties and geometry until the final, master-grade tool is born. Below is a simplified flowchart of this journey from raw material to a certified inspection instrument.
High-carbon tool steel or stainless steel is chosen for its stability and hardenability.
The material is forged to align its grain structure and then annealed to relieve internal stresses.
The basic shape of the ruler is created using CNC milling, leaving material for final finishing.
A crucial heat treatment process to achieve the required hardness (>62 HRC) and toughness.
The ruler's faces and edge are ground to tight tolerances, preparing it for the final lapping stage.
The knife edge is meticulously hand-lapped using fine abrasive compounds to achieve the final straightness and finish.
Verification against master gauges in a temperature-controlled lab using interferometry or electronic comparators. ISO/DIN certification is issued.
This process, especially the stress-relieving (annealing) and lapping stages, is what separates a premium inspection ruler from a simple piece of shaped metal. It ensures that the accuracy is built into the very molecular structure of the tool, guaranteeing its long-term stability.

Application Scenarios: Where Precision Matters Most
The versatility of the knife edge ruler makes it indispensable across a wide range of industries. Its applications go far beyond a simple workshop tool, extending into critical quality assurance roles.
- Automotive & Engine Building: Checking the flatness of engine blocks, cylinder heads, and gearbox flanges is a classic application. A warped cylinder head, even by a few microns, can lead to gasket failure, loss of compression, and catastrophic engine damage.
- Aerospace Manufacturing: Used to verify the straightness of wing spars, fuselage components, and mounting surfaces for sensitive avionics. In this industry, there is no margin for error.
- Machine Tool Industry: Essential for aligning and calibrating machine beds, guideways, and tables on lathes, mills, and grinders. The accuracy of the machine tool is directly dependent on the straightness of these components.
- Printing & Paper Industry: Verifying the alignment and straightness of rollers in large printing presses and paper mills. Any misalignment can cause paper tearing, inconsistent ink application, and significant downtime.
- Alternative Materials - The Marble Ruler: In environments where thermal stability is the absolute priority, a granite or marble ruler is the tool of choice. With a near-zero coefficient of thermal expansion, these are used in metrology labs and for calibrating other measuring instruments.
- General Engineering & Fabrication: While less common, fabricators use them to check the straightness of welded frames and structures where flatness is critical. A robust metal angle ruler is often used in conjunction to check for perpendicularity.
Case Study: Machine Tool Alignment at a CNC Shop
Client: A high-precision CNC machining firm.
Challenge: The firm was experiencing subtle but persistent issues with parallelism on parts produced by one of their large vertical machining centers. The machine's own diagnostics showed no errors.
Solution: A maintenance engineer used a 1000mm Grade 00 knife edge ruler to inspect the machine's primary X-axis guideway. By placing the ruler along the guideway and using a feeler gauge, they identified a 12-micrometer dip in the center of the bed, likely caused by years of wear.
Outcome: This direct physical evidence, impossible to obtain with less precise tools like standard aluminum rulers, allowed the team to schedule a targeted guideway scraping and realignment. Post-service, the machine was back to producing parts within a 3-micrometer tolerance, restoring the shop's confidence and product quality. This case highlights the diagnostic power of a simple, yet incredibly precise, tool.

Choosing Your Partner in Precision: Manufacturer & Customization
Not all rulers are created equal. When selecting a knife edge ruler, you are not just buying a tool; you are investing in a promise of accuracy. The manufacturer's expertise, quality control, and commitment to standards are paramount.
Manufacturer & Product Comparison
| Feature | STR Precision Instruments | Generic/Standard Supplier |
|---|---|---|
| Certification | Individual calibration certificate provided, traceable to ISO/DIN standards. | Often states "meets standards" with no individual proof. |
| Material Traceability | Full material traceability reports available, specifying batch and composition. | Material specified as "tool steel" with no further details. |
| Lapping Process | Multi-stage hand-lapping and interferometric verification for edge quality. | Machine lapped, often with less rigorous quality checks. |
| Stress Relieving | Multiple cryogenic and thermal stress-relieving cycles for long-term stability. | Basic or no stress-relieving, leading to potential warping over time. |
| Warranty & Support | Comprehensive warranty against defects in material and workmanship, expert support available. | Limited warranty, minimal technical support. |
Customization Solutions
Standard sizes don't always fit unique applications. We understand that and provide extensive customization options to ensure you get the perfect tool for your job.
- Custom Lengths: From short, pocket-sized rulers for tight spaces to massive, multi-meter straight edges for large machine beds.
- Material Selection: Choose from tool steel, stainless steel, or even granite based on your application's needs for hardness, corrosion resistance, or thermal stability.
- Grips and Handles: For larger rulers, ergonomic and insulated grips can be added to improve handling and reduce heat transfer from hands.
- Custom Markings: While not a measuring tool, we can add laser-etched company logos, asset tags, or serial numbers for inventory management.
Frequently Asked Questions (FAQ) - Your Technical Questions Answered
Its primary use is to verify the straightness of a surface with very high accuracy. It's a comparative tool, not a measuring tool. By placing the edge on a workpiece and using a light source behind it, you can visually detect any gaps, which indicate deviations from perfect straightness. It is the gold standard for checking items like cylinder heads, machine beds, and surface plates.
It depends on the application. For general workshop and industrial use, hardened tool steel (like T10A or similar) is ideal due to its excellent hardness (resists wear) and stability. For environments with corrosive fluids or high humidity, stainless steel (like 4Cr13) is a better choice. For ultimate thermal stability in a controlled lab environment, a granite marble ruler is unmatched.
These grades define the maximum permissible deviation from a mathematically perfect straight line. The German standard DIN 874 is widely accepted:
- Grade 00: Laboratory/Master grade. The highest precision, used for calibrating other tools. Tolerance = (2 + L/1000) µm.
- Grade 0: Inspection/Workshop grade. High precision for quality control and critical machine setup. Tolerance = (4 + L/500) µm.
- Grade 1: General Production grade. Good precision for less critical tasks. Tolerance = (10 + L/200) µm.
Proper care is essential to maintain accuracy. Always clean the ruler with a soft, lint-free cloth and a light solvent after use. Apply a thin coat of rust-preventative oil. Store it in its protective case, preferably laid flat or hung vertically to prevent sagging. Never place other tools on top of it. Avoid dropping it or striking the edge against hard surfaces.
Absolutely. Recalibration is crucial. A knife edge ruler should be recalibrated periodically (typically annually, depending on use) by a certified metrology lab. The lab will compare it against a master straightedge of higher accuracy (often using an electronic comparator or laser interferometer) and issue a new certificate of calibration. A metal angle ruler (precision square) is calibrated similarly by checking its 90° or 45° angle against a master cylinder or angle blocks.
The key differences are the edge profile and accuracy. A standard straight edge has a flat, wider edge (e.g., 5-8mm thick), making it difficult to detect small light gaps and prone to parallax error. A knife edge ruler has a beveled, lapped edge that provides a single line of contact, maximizing the visibility of surface deviations. Furthermore, knife edge rulers are manufactured to much higher accuracy standards (like DIN 874/00) than general-purpose straight edges.
While our expertise lies in high-precision steel and granite rulers, we can source and supply high-quality, extruded aluminum rulers and straight edges for applications where light weight is a priority and the highest level of precision is not required. These are excellent for tasks like layout work, general fabrication checks, or as guides for cutting tools. Please contact our sales team with your specific requirements.
Our Commitment to Trust and Quality
Authoritativeness & Trustworthiness (E-E-A-T): We demonstrate our expertise through detailed technical data and real-world experience. Our authority is backed by adherence to international standards like ISO 9001 and DIN 874. Our commitment to trustworthiness is reflected in our transparent processes, individual calibration certificates, and dedicated customer support.
- Delivery & Logistics: Standard sizes are typically in stock and ship within 48 hours. Custom orders have a clear lead time provided at the time of quotation. All instruments are shipped in secure, padded cases to ensure they arrive in perfect condition.
- Warranty & Quality Guarantee: Every knife edge ruler we sell is backed by a 2-year warranty covering defects in materials and manufacturing. We stand by the accuracy stated on our calibration certificates.
- Customer Support: Our team of metrology experts is available to help you select the right tool, provide application support, and answer any technical questions you may have.
Further Reading & Industry Reference: The principles of using straightedges for flatness determination are a cornerstone of metrology. As noted by experts in forums like Practical Machinist, "There is no substitute for a quality straight edge and a set of feelers when you need to know what a surface is *really* doing. Light-gapping with a knife edge is one of the oldest and still most reliable methods." This sentiment underscores the enduring value of these fundamental tools in a high-tech world.
Reference: "Scraping for accuracy", Practical Machinist Forum, www.practicalmachinist.com
-
Ultimate Guide to Using a Professional Metre Spirit LevelNewsApr.16,2026
-
Ultimate Guide to Using and Choosing a Meter Spirit LevelNewsApr.09,2026
-
A Comprehensive Guide to Selecting the Ideal Meter Long Spirit Level for Accurate MeasurementsNewsApr.07,2026
-
Choosing the Perfect Metal Spirit Level for Accurate Measurements and ProjectsNewsApr.04,2026
-
Exploring the Diverse Levels of Spirits Quality and Production TechniquesNewsMar.31,2026
-
Understanding the Precision of a Level Spirit Level for Accurate MeasurementsNewsMar.28,2026
Related PRODUCTS


